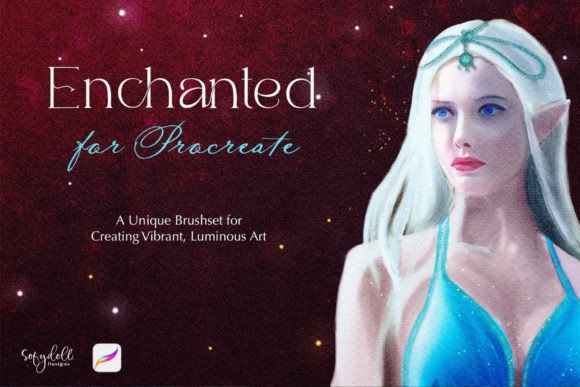
Mastering Mystical Art: A Workflow Guide to The Enchanted Brushset for Procreate
Digital illustration has evolved from a niche hobby into a robust professional workflow for designers, concept artists, and content creators. Within this expansive ecosystem, the choice of tools significantly influences both the efficiency of production and the aesthetic quality of the final output. For artists specializing in fantasy, sci-fi, or high-contrast visual storytelling, The Enchanted Brushset for Procreate offers a specialized solution. It is not merely a collection of digital stamps; it is a curated system designed to streamline the creation of magical illustrations, particularly those relying on the dramatic interplay of bright colors against dark backgrounds.
Integrating a new brush set into an existing creative pipeline requires more than a simple download. It demands an understanding of how these assets interact with your current methods, from initial sketching to final export. This guide explores how to effectively implement The Enchanted Brushset for Procreate into your daily workflow, ensuring that you maximize its potential while maintaining consistency and quality in your artistic output.
Understanding the Asset Package
Before diving into execution, it is essential to audit what is included in the package. The Enchanted Brushset for Procreate contains 44 distinct brushes, 6 colored backgrounds native to Procreate, 8 extra richly textured backgrounds, 1 canvas texture, and 6 bright color palettes. This comprehensive suite addresses multiple stages of the illustration process, reducing the need to switch between external applications for texture overlays or color selection.
The 44 brushes are the core engine of this set. They are engineered to mimic traditional media while leveraging the dynamic capabilities of the iPad and Apple Pencil. The inclusion of specific backgrounds and palettes suggests a workflow oriented toward speed and atmospheric consistency. By providing pre-configured environments, the set allows artists to bypass the often time-consuming phase of setting up the perfect canvas tone, allowing them to jump straight into value blocking and composition.
Preparation and Setup: Integrating into Your Library
Successful implementation begins with organization. When you first import The Enchanted Brushset for Procreate, avoid the temptation to leave it as a single, monolithic folder. Instead, integrate the brushes into your existing library structure based on function. For example, separate the blending brushes from the detail brushes. This categorization supports a smoother mental transition during the creative process, as you can quickly locate the right tool without breaking your flow state.
Compatibility is rarely an issue with modern Procreate updates, but verifying your software version ensures that all pressure sensitivity and tilt features function as intended. Additionally, take time to review the 6 bright color palettes. Import them into your Procreate palette library and consider renaming them with descriptive tags relevant to your projects, such as "Neon Magic" or "Deep Forest." This small administrative step saves significant time during the coloring phase, as you will not need to hunt for hex codes or adjust sliders mid-painting.
The Creative Process: From Dark Backgrounds to Bright Highlights
The primary strength of this brush set lies in its optimization for high-contrast art. The workflow for creating mystical illustrations typically follows a "dark-to-light" approach. Here is how to leverage the included assets at each stage:
Stage 1: Establishing the Atmosphere
Start by selecting one of the 6 colored backgrounds provided within Procreate. These are not flat colors; they possess subtle gradients and tones that serve as a foundational mid-tone. Alternatively, use one of the 8 extra richly textured backgrounds if your project requires a gritty, aged, or organic feel. Using the included canvas texture over this background can unify the digital surface, giving it the tooth of traditional paper or canvas. This step is crucial for grounding the illustration, preventing it from looking too sterile or digitally flat.
Stage 2: Value Blocking and Composition
With the background established, use the broader brushes from the set to block in major shapes. Focus on silhouette and readability. Since the background is already dark or richly toned, your initial shapes should define the light sources. The brushes in The Enchanted Brushset for Procreate are designed to respond well to pressure variations, allowing you to create soft edges for atmospheric perspective and hard edges for focal points. Keep your layers organized; separate your character or main subject from the environmental elements to allow for non-destructive editing later.
Stage 3: Adding Magical Elements
This is where the specific design of the brushes shines. Use the specialized effect brushes to add glows, sparks, mist, and ethereal lighting. Because the set is optimized for bright colors on dark backgrounds, these effects will pop with minimal effort. Utilize the "Add" or "Screen" blend modes for these layers to enhance the luminosity. The 6 bright color palettes included in the set are particularly useful here, offering pre-balanced hues that harmonize with the dark undertones of your background. This reduces the cognitive load of color theory, allowing you to focus on placement and intensity.
Efficiency and Consistency in Professional Workflows
For freelancers and agency artists, time is a critical resource. The Enchanted Brushset for Procreate contributes to efficiency by standardizing the texturing and lighting process. When working on a series of illustrations—such as book covers, game assets, or social media content—using the same set of backgrounds and textures ensures visual consistency across the brand or project. This consistency builds recognition and professionalism in your portfolio.
Moreover, the pre-made palettes eliminate decision fatigue. In a commercial setting, clients often request specific moods. Having a "magical" or "enchanted" palette ready to go allows you to present concepts faster. You can iterate on compositions without getting bogged down in color selection, leading to quicker approval cycles and higher throughput.
Quality Control and Refinement
While automated tools and presets speed up production, human oversight remains vital for quality control. After applying the magical effects, zoom out frequently to check the overall balance. High-contrast art can sometimes become noisy if too many bright elements compete for attention. Use the blending brushes from the set to soften areas that are too distracting. Ensure that the focal point remains the brightest and most detailed area of the composition.
Additionally, review the texture overlay. While the included canvas texture adds realism, it can sometimes interfere with fine details. Adjust the opacity of the texture layer or use a mask to remove it from critical areas like faces or intricate mechanical parts. This selective application maintains the organic feel of the piece while preserving clarity where it matters most.
Long-Term Use and Skill Development
Investing in a tool like The Enchanted Brushset for Procreate is not just about immediate project completion; it is about long-term skill acquisition. By consistently using these brushes, you develop muscle memory for their specific behaviors. You learn how much pressure is needed for a soft glow versus a hard spark. This familiarity translates into faster execution and more intuitive art-making.
Furthermore, analyzing why these brushes work well for dark-background art can improve your general understanding of digital painting principles. You begin to understand how light interacts with texture and how color saturation behaves differently on dark versus light canvases. These insights are transferable to other software and styles, making this purchase a valuable educational investment as well as a practical one.
Conclusion
The Enchanted Brushset for Procreate is a powerful asset for any digital artist looking to specialize in mystical, high-contrast illustrations. By understanding its components and integrating them thoughtfully into your workflow, you can enhance both the quality and efficiency of your work. From the initial setup of textured backgrounds to the final application of glowing effects, this set provides a structured path to creating captivating magical art. Embrace the tools, organize your library, and let the process guide your creativity toward professional, polished results.